-30%
Jamaican Black Castor Oil


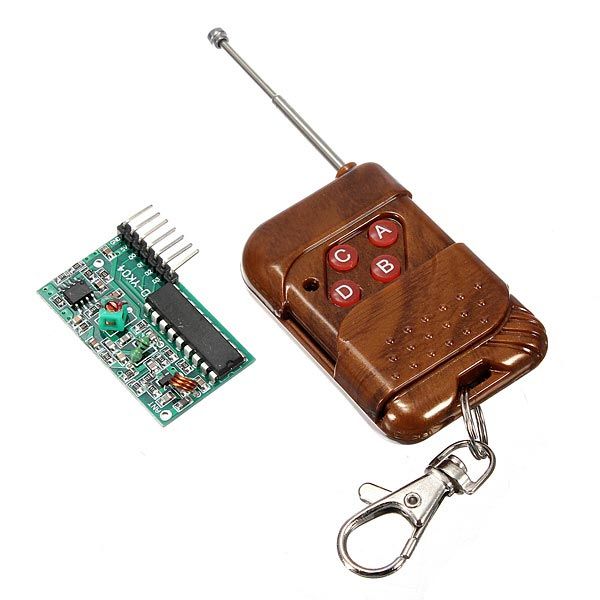
DescriptionThis is RF Remote Control Module suitable for controlling robotic car.It has 4 buttons: for start, stop, accelerate and decelerate.Features:Remote control unit(Transmitter):Operating voltage: DC 12V(23A / 12V battery x 1)Operating current: 10mA at 12VRadiated power: 10mW at 12VTransmission distance: 50m – 100mTransmitting frequency: 315MHZModulation mode: ASK (Amplitude Modulation)Encoder types: fixed codeDecoding receiver board:Operating voltage: DC 5VReceiver sensitivity is -98dBLeg 7 bits: VT, D3, D2, D1, D0, 5V and GNDVT is a valid signal high output pin upon receiving a valid signal, the pin output high, may also drive the relayNote: There are four buttons on the remote control, and respectively correspond to the four data bits to the receiving board output pin D0, D1, D2, and D3. Press the buttons transmit signals, the corresponding data bit is output high.Applications:Automotive alarm systemsAutomotive RKE systemsAutomotive immobilizersGate and garage door openersIdentity tokensBurglar alarm systemsHow to get started with RF remote control moduleRadio-frequency (RF) remote controls are very common. Garage-door openers, car-alarm fobs and radio-controlled toys have always used radio remotes, and the technology is starting to show up in other applications, too.Image for RF receiverThey’re still pretty rare in home-theater devices,but you will find RF remotes controlling certain satellite-TV receivers and high-end stereo systems. Instead of sending out light signals, an RF remote transmits radio waves that correspond to the binary command for the button you’re pushing. A radio receiver on the micro -controller (in our case Arduino) receives the signal and decodes it. The greatest advantage to radio-frequency remotes is their range: They can transmit up to 30 meters from the receiver, and Infra-red signals can go through walls. This is why you’ll now find IR/RF remotes for home-theater components. These remotes use RF-to-IR converters to extend the range of an infrared remoteThe remote has 4 buttons which corresponds to 4 pins on the receiver. The RF module uses the SC2272-M4, which is the momentary version, so the pin will stay HIGH as long as we hold down the button. To use this device we don’t need any special library. You will need the following:Arduino UnoRF receiverRF remoteJumper wireWe will just connect the pins of the receiver as indicated below,pin 9 -> D0pin 10 ->D1pin 11 -> D2pin 12 ->D3Something to note is that the S (VT) is not connected because it goes high whenever you push a button on the remote.Arduino code:/*********************************************************/ void setup(){ Serial.begin(9600); // setting the baud rate Serial.println("RF receiver button decode"); // printing } void loop(){ /*here in this code I used if statement to setup my loops codes, yo can also use while loop statements to control the output in the serial monitor*/ if (digitalRead(9) == HIGH) { // Button a pressed Serial.println("you are pushing on the A"); // if the Key is pushed this above text will be displayed } if (digitalRead(10) == HIGH) { // Button B pressed Serial.println("you are pushing on B"); } if (digitalRead(11) == HIGH) { // Button C pressed Serial.println("you are pushing on C"); } if (digitalRead(12) == HIGH) { // Button D pressed Serial.println("you are pushing on D"); } }Then your serial monitor must show you this ThanksPackage includes: 1×RF Receiver 1×RF Remote Control